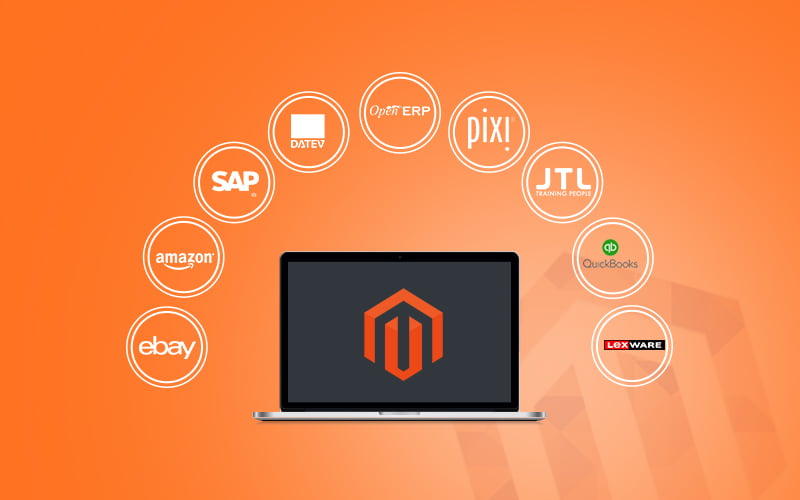
Magento integration involves connecting the platform with external business systems such as ERP, CRM, SAP, payment gateways, shipping carriers, and WMS, enabling automated data synchronisation, operational efficiency, and a unified view across the business.
This article covers five methods to create an integration with Magento: native service integrations configured in the Magento Admin, integrations via third-party extensions or custom modules, API-based connections, middleware-based integrations, and event-driven integrations. For each method, we outline how it works, recommended use cases, and practical steps for implementation.
Method 1: Magento built-in integration for payments, shipping, and tax
How it works
Magento provides a range of built-in integrations that cover key checkout-related services, including payments, shipping, and tax. Once enabled in the Admin, these built-in connectors securely exchange order, shipping, and tax data with each provider’s system. They are designed to support standard capabilities without requiring additional development or third-party tools, such as rate calculation, label printing, tracking sync, real-time tax calculation, and refund processing.
Supported service categories include:
-
Payment providers such as PayPal, Braintree, and Authorize.Net.
-
Shipping carriers such as UPS, USPS, FedEx, and DHL.
-
Tax calculation services such as Avalara and Vertex (Vertex available in Adobe Commerce only).
This approach is best suited for stores that already rely on payment, shipping, or tax providers available as native Magento connectors, where data can flow directly between Magento and the service provider without the need for ERP or middleware. It is particularly effective for implementations that require a stable, pre-tested connection with minimal configuration and no custom logic.
Step-by-step guide
1. Access the Magento Admin panel: Log in to your Magento 2 Admin Dashboard (yourstore.com/admin), then navigate to Stores > Configuration under the Settings section.
2. Configure the integrations:
-
For Payments: Navigate to Stores > Configuration > Sales > Payment methods, choose your preferred payment gateway, enter the API credentials and merchant account details, adjust transaction types, order statuses, and accepted currencies, then save your changes.
-
For Shipping: Go to Stores > Configuration > Sales > Shipping Methods, enable your preferred carrier, enter your account credentials or API key, and configure the shipping origin, weight limits, rates, and delivery regions.
-
For Tax: Go to Stores > Configuration > Sales > Tax, set up tax classes for products, customers, and shipping, define tax calculation settings such as basis, rounding, and discount inclusion, add tax zones and rates for your target markets, and integrate with tax providers like Avalara or Vertex if required.
3. Test the connection:
-
For Payments: Place a test order using sandbox credentials.
-
For Shipping: Check rate calculation at checkout.
-
For Tax: Simulate checkout with different address locations.
4. Review logs and finalise configuration: Review system logs to confirm successful API communications, then clear the cache and reindex your store via System > Cache Management, and click Flush Magento Cache to ensure all settings are applied.
Method 2: Magento integration via third-party extensions or custom modules
How it works
This method allows Magento to connect with external systems or add new capabilities by installing third-party extensions from the Adobe Commerce Marketplace or deploying custom-developed modules within Magento’s modular framework.
Third-party extensions provide ready-made connectors or features without the need for custom development. Top third-party extensions:
-
Xtento Order Export/Import – Automates data exchange via CSV/XML, API, or FTP/SFTP, commonly used to integrate with ERP, warehouse, shipping, or accounting systems
-
APPSeCONNECT Connector for Magento 2 – Integrates Magento with ERPs like SAP, Microsoft Dynamics, NetSuite, Zoho, and CRMs like Salesforce, supporting both real-time and scheduled data sync
-
Webkul Odoo Connector – Two-way sync between Magento and Odoo for orders, products, and customers
-
Boostmyshop ERP/Embedded ERP – Adds ERP functionality directly into Magento with external warehouse or accounting system integration
-
Magento 2 QuickBooks Integration (Magenest) – Syncs order, customer, and invoice data from Magento to QuickBooks Online
Custom modules are required when an integration requires business-specific logic which no available extension can meet. They can hook into Magento events, extend or override functionality using plugins, and add new API endpoints. This allows Magento to synchronise with unsupported systems, transform data before sending or receiving it, or automate complex workflows.
This method is best suited for external platforms such as ERP, CRM, or WMS systems that lack a native Magento connector but can be integrated through a module, for extending store functionality with advanced features like loyalty programs, complex discount rules, or custom checkout flows, and for workflows that require Magento to process or transform data before sending or receiving it.
Step-by-step guide
1. Define your integration requirements
Before selecting an approach, confirm:
-
The external system to integrate (ERP, CRM, WMS, accounting, etc).
-
The data to be exchanged (orders, products, customers, inventory, etc).
-
Whether synchronisation should be real-time, scheduled, or batch.
-
If a suitable Marketplace extension exists or if a custom build is require.
2. Set up the integration using an extension or custom module
Option 1: Third-party extension
-
Find a suitable extension
-
Search the Adobe Commerce Marketplace or trusted vendor sites.
-
Check Magento version compatibility, supported data types, sync direction, update history, and reviews.
-
Install and configure
-
Follow the provider’s installation guide.
-
Install via Composer or manually upload to your Magento server.
-
Run Magento CLI commands (e.g. upgrade, compile, deploy) to complete setup.
-
Configure settings in the Magento Admin (API keys, endpoint URLs, mapping rules).
Option 2: Custom module
-
Plan the module
-
Define the required data flow, triggers, and API endpoints.
-
Identify where to use Magento events, observers, or plugins.
-
-
Develop and deploy
-
Create the module structure (registration.php, module.xml, etc).
-
Implement logic using Magento’s dependency injection and event/observer system.
-
Add custom API endpoints if required.
-
Deploy to staging, then run setup and compilation commands.
-
3. Test the integration
- Sync sample records: Test sample data such as orders, products, and customers to confirm successful data transfer.
- Verify data accuracy: Check that synced data is correct and complete in both Magento and the external system.
- Confirm cron jobs and event triggers: Ensure scheduled tasks and event-based synchronisation run as intended across environments.
4. Secure and monitor the integration
- Restrict API scopes and user permissions to the minimum required. E.g.: If the integration only needs to read product data for a PIM system, grant read-only access to product endpoints and deny access to customer or order data.
- Rotate API keys and tokens regularly to reduce the risk of unauthorised access.
- Enable logging, alerts, and exception handling: Keep detailed logs and set up alerts for failed cron jobs or API errors to detect issues early.
- Validate webhook signatures and secure endpoints: Verify requests with a shared secret and use HTTPS for all webhook URLs.
- Monitor logs and system health: Review logs regularly to track repeated sync or cron failures.
5. Go-live and maintain
- Deploy to production once all test cases pass on staging: Move to the live environment only after confirming data mapping, sync logic, and cron jobs work correctly to avoid disruptions.
- Run a final delta sync to align staging and production data: Perform a one-time synchronisation before launch to ensure product, customer, and order data are consistent.
- Document configuration and create a rollback plan: Record installed modules, API credentials, and schedules, and keep a rollback procedure ready in case of failure.
- Schedule regular monitoring and maintenance: Review logs periodically, update the connector when systems are upgraded, and re-test after major updates to ensure compatibility.
Method 3: API-based integration with Magento (REST & SOAP)
How it works
This method uses Magento’s built-in web APIs to enable secure, direct data exchange with external systems. In the Magento Admin, you configure API access permissions to define which store data — such as products, orders, customers, or inventory — the external system can access. Once configured, the external system calls Magento’s API to retrieve or update data, either in real time or on a scheduled basis, depending on the synchronisation model required.
Magento supports two API types:
-
REST – preferred for modern systems because it is simpler, faster, and works well with JSON over HTTP. Commonly used for integrating with cloud-based platforms such as NetSuite, Salesforce, or custom microservices.
-
SOAP – supported for legacy or enterprise platforms that require strict data contracts and WSDL definitions. Often used for on-premise systems like SAP ECC or Oracle E-Business Suite.
This approach is ideal when you need direct system-to-system integration with full control over what data is synced, when, and how—particularly when the external platform already supports API communication. Typical use cases include:
-
Syncing orders, products, and customer records with ERP or accounting systems such as NetSuite, SAP, or QuickBooks.
-
Connecting Magento with CRMs like Salesforce or Zoho for customer lifecycle tracking.
-
Updating inventory in real time from WMS or 3PL providers.
-
Orchestrating Magento alongside other business applications through middleware or iPaaS platforms like Integration Flow, MuleSoft, or Boomi; and exporting data to reporting or BI tools via scheduled API calls.
Step-by-step guide
1. Define the integration scope
-
Identify the systems to be connected (ERP, CRM, WMS, etc.)
-
List the data objects involved (products, orders, customers, inventory, invoices)
-
Decide the direction and frequency of synchronisation:
-
Real-time: Data is pushed or pulled immediately when changes occur (e.g., order creation triggers an API call to the ERP).
-
Scheduled: Data is synced at set intervals using cron jobs or external schedulers (e.g., inventory updates every 30 minutes).
-
On demand: Data is exchanged only when manually triggered or by specific business events (e.g., bulk product upload).
-
One way: Data flows in a single direction (e.g., Magento → ERP for order data only).
-
Two-way: Data flows in both directions, keeping both systems synchronised (e.g., inventory updates from ERP to Magento and order updates from Magento to ERP).
-
2. Choose the API type: REST or SOAP
-
REST: Use if the external system supports JSON and modern HTTP/HTTPS protocols. Ideal for cloud platforms and modern applications.
-
SOAP: Use if the external system requires WSDL-based interaction, XML messaging or strong data typing. Common with older enterprise stacks such as SAP ECC or Oracle E-Business Suite.
3. Set up API credentials in Magento
-
In the Magento Admin dashboard, go to System > Extensions > Integrations, click Add New Integration.
-
Enter the required details such as the integration name, email, and optional callback URL.
-
Under API, select the resources to expose (e.g., Sales > Orders, Catalog > Products).
-
Save and activate the integration to generate the necessary authentication credentials — an Access Token for REST, or Consumer Key/Secret and Token Key/Secret for SOAP (OAuth 1.0a).
4. Make test API calls
Use an API client such as Postman, Insomnia, or a custom-built tool to send authenticated requests and verify connectivity.
-
For REST, call the appropriate endpoint and include the access token in the request header.
-
For SOAP, use the WSDL URL and authenticate with the generated Consumer and Token keys.
5. Develop or configure the external system
-
Use Magento DevDocs to reference the official API specifications and ensure accurate implementation.
-
Ensure the system authenticates correctly, processes API responses correctly, and respects Magento’s pagination limits and rate throttling rules.
6. Schedule or trigger synchronisation:
-
For real-time updates, trigger API calls automatically when specific events occur in the external system (for example, when an order is created or inventory changes).
-
For scheduled updates, use cron jobs or workflow automation tools such as Zapier or n8n to run synchronisation at defined intervals.
7. Monitor and log API activity
-
Log requests, responses, and errors support debugging and auditing.
-
Implement retry logic for failed requests to maintain data consistency and prevent information loss during synchronisation.
8. Test the integration end-to-end
-
Place test orders or update products in Magento to validate the complete data flow.
-
Check the external system to confirm that records are created or updated correctly and that all field mappings align.
-
Simulate failures such as timeouts or invalid payloads to verify that logging, retries, and recovery processes work as expected.
API-based integration connects Magento directly to another system via its REST or SOAP APIs, providing granular control over the scope, timing, and direction of data exchange. When managed manually, your team is responsible for developing the integration, configuring schedules, monitoring performance, handling errors, and applying updates as APIs change.
A managed iPaaS platform like On Tap’s Integration Flow delivers the same API connectivity while also managing scheduling, real-time monitoring, automated error recovery, and ongoing maintenance, ensuring the integration stays stable, up to date, and fully optimised.
Method 4: Integrating with Magento via middleware
How it works
This method allows you to integrate Magento with multiple systems through a central “middle layer” that manages all data transfers and rules.
Magento communicates with the middleware via REST APIs, SOAP APIs, or file-based sync (e.g., CSV, XML via SFTP), depending on the system’s capability. The middleware then handles converting formats, applying business rules, routing data to the right systems, and retrying failed transfers.
It is particularly valuable when Magento needs to integrate with multiple systems or follow complex workflows, without embedding that logic inside Magento itself.
There are typically 2 middleware approaches:
-
iPaaS platforms (Integration Platform as a Service) are cloud-based integration hubs that connect Magento with other systems using prebuilt connectors, visual workflow builders, and scheduling tools. They handle data transformation, routing, and error management, allowing you to integrate without building everything from scratch. While powerful, they often require Magento-specific configuration or customisation.
To overcome these limitations, On Tap’s Integration Flow offers a purpose-built, fully managed alternative. Developed by On Tap — a 19+ years Magento Solution Partner, Integration Flow connects Magento with ERP, WMS, CRM, and more without code deployments, custom modules, or ongoing development effort. With 24/7 monitoring, fast setup, and expert-managed changes, it eliminates technical overhead and keeps your integrations running smoothly. -
Custom-built microservices are bespoke services developed in frameworks such as Node.js, Laravel, or Python that give you full control over integration logic, data handling, and performance. This approach allows you to design integrations exactly to your requirements but also means taking on all development, hosting, monitoring, and maintenance responsibilities.
This method is ideal when Magento needs to connect with multiple external systems or when complex transformation, routing, or sync timing is required. It is commonly used to link Magento with ERP, CRM, PIM, or POS platforms through a single hub; transform and validate data between Magento and legacy systems, such as mapping product attributes or tax rules; and manage sync logic centrally - for example batching orders to ERP every 15 minutes or retrying failed inventory updates. Middleware is also effective when integrating Magento with SaaS platforms that provide standard APIs but require custom workflows, such as coordinating a Shopify-to-Magento multi-platform sync.
Step-by-step guide
1. Clarify business and technical requirements
Before building anything, define:
-
Source and destination systems: E.g. Magento ↔ ERP (SAP, NetSuite), WMS, CRM, or another eCommerce platform (e.g. Shopify).
-
Data types to sync: Orders, inventory, customers, products, shipping updates, pricing, tax rules, etc.
-
Frequency & direction: Real-time (via webhook or API), batch (every 15–30 minutes), or on-demand; one-way (Magento → ERP) or two-way (Magento ↔ ERP).
-
Business rules needed in middleware: Conditional syncing (e.g., only sync paid orders), field mapping logic (e.g., Magento SKU → ERP ItemCode), and data transformation (e.g., address formatting or tax code mapping).
-
Create a data flow diagram showing what moves where and how often.
2. Select middleware type
Option A: Use an iPaaS (recommended for business-managed integrations)
Common iPaaS platforms that support Magento include Integration Flow, Celigo, APPSeCONNECT, Boomi, and MuleSoft. These platforms provide ready-made connectors for Magento and other systems, allowing you to configure integrations without custom coding.
How to set up:
-
Select the Magento connector – choose the REST or SOAP connector depending on your target system’s API capabilities.
-
Select the ERP/CRM connector – pick the relevant connector for the system you want to integrate, such as NetSuite, SAP, Salesforce, or Microsoft Dynamics.
-
Map fields between systems – use the platform’s drag-and-drop interface to match Magento data fields to the target system’s fields (e.g., map Magento SKU to ERP Item Code).
-
Add filters and conditions – define rules for when data should sync, such as syncing only orders with a status = complete.
-
Define the schedule or trigger – choose between real-time updates via webhooks or scheduled/batch jobs at fixed intervals.
Option B: Build a Custom Middleware (recommended for complex use cases)
Technology stack options
When developing custom middleware for Magento, you can choose from several popular technology stacks depending on your team’s skills and the integration’s requirements:
-
Node.js + Express – a lightweight, high-performance option well-suited for REST API–based integrations and real-time data handling.
-
Laravel/PHP – a good choice if your development team already works in Magento’s PHP ecosystem, making it easier to reuse existing skills and tools.
-
Python + FastAPI or Flask – ideal for quick-to-build, script-style integrations or when working with data transformation and automation tasks.
The choice of stack often depends on the systems being connected, the type of data exchange, and the team’s technical expertise.
Architecture overview
When building custom middleware for Magento, there are several core components the solution will need:
-
Magento API client – the part of the middleware that connects to Magento’s REST or SOAP API to send or receive data.
-
External system API client – the part that connects to the other system’s API (for example, an ERP or CRM).
-
Scheduler – a service, such as a cron job or worker process, that controls when synchronisations run if they are not event-triggered.
-
Error handling, logging, and retry queues – tools and processes that capture integration errors, record what was sent or received, and automatically retry failed transfers.
These elements work together so the middleware can reliably fetch data from one system, transform it if necessary, and send it to the other system without manual intervention.
3. Set up API access on Magento
To set up API access in Magento for middleware integration, go to System > Extensions > Integrations and create a new integration user with the necessary resource access (such as Products, Orders, Customers, and Inventory).
Once created, generate the Access Token for REST or OAuth credentials for SOAP. You can then use these credentials to build and test API connectors in your middleware, enabling secure communication between Magento and external systems.
4. Build and test API connectors in middleware
Implement the API connectors that allow your middleware to communicate with both Magento and the external system:
-
Retrieve data – use the source system’s API to request the required records, such as orders, products, or inventory.
-
Transform and map fields – adjust data formats and align field names so they match the target system’s schema.
-
Add system-specific metadata – include any additional attributes required by the target system, such as warehouse codes or tax classifications.
-
Send data to the target system – transmit the prepared data through the target system’s API, or export it in supported formats such as XML or via SFTP.
-
Test in a sandbox environment – run the complete integration flow in a controlled test environment and implement logging at each stage to ensure full traceability and error handling.
5. Implement core middleware services
Add the operational features that will keep your middleware reliable and easy to maintain:
-
Scheduling – set up a way to control when integrations run. This can be a timed schedule (cron jobs), queued sequences, or instant triggers via webhooks.
-
Queue handling – use a job queue system such as Redis, Amazon SQS, or a database queue to manage the order and timing of tasks so data is processed in the right sequence.
-
Logging – record both the raw data received and the transformed data sent, so you have a full audit trail for troubleshooting and compliance.
-
Retry logic – configure automatic retries for failed syncs with a delay (backoff), and allow manual retries when needed.
-
Health checks – create a /health endpoint or similar so monitoring tools can confirm the middleware is running and responsive.
These services ensure your middleware can handle errors gracefully, keep data flowing on schedule, and be monitored for ongoing performance.
6. Set up monitoring and alerts:
Put systems in place to detect and respond to issues quickly:
-
Configure alerts (via Slack, email, or webhook) for critical problems such as failed synchronisations, API timeouts, or data mapping errors (for example, a missing product SKU).
-
Integrate with monitoring tools such as Sentry to capture and track application errors, and Grafana or Datadog to monitor request volume, latency, and other performance metrics.
7. Test the integration end-to-end
Run full tests to confirm the middleware works correctly under real-world conditions:
-
Trigger real sync flows – for example, create test orders, update inventory, or add new products in Magento
-
Verify the data path – confirm information reaches the external system with the correct structure and mapping
-
Simulate failures – disable the target endpoint or introduce incorrect data to check error logging and retry handling
-
Check performance under load – run 20–50 sync operations to monitor stability, queue behaviour, and processing times
-
Validate health checks and observability – ensure /health endpoints are active and that logs/alerts reflect the correct system status
Method 5: Event-based integration via Webhooks/Message Queue (Adobe Commerce only)
How it works
This method enables Adobe Commerce to trigger integrations automatically when specific events occur, such as an order being placed, a customer registering, or inventory being updated. When an event happens, the relevant data is pushed to connected systems automatically, eliminating the need for manual sync or constant polling.
Adobe Commerce supports two native event-driven mechanisms:
-
Webhooks – instantly send event details to another system over HTTP when the event occurs.
-
Message Queue Framework (MQF) – publishes event payloads to RabbitMQ for asynchronous processing, allowing other systems to consume and process them later without affecting Magento’s performance.
This method is ideal when you need real-time or asynchronous integration with other systems based on Magento events, especially where API polling would be inefficient or slow. It can trigger fulfilment workflows the moment a new order is placed by pushing data to ERP or WMS, keep inventory synchronised in real time when stock levels change, and send transactional updates such as invoices, shipments, and refunds to accounting or reporting platforms. Event-driven integration also supports queue-based scenarios that require guaranteed delivery, batching, or delayed processing, and can notify external services such as CRMs or BI tools whenever customers register, subscribe, or abandon checkout.
Step-by-step guide
1. Confirm prerequisites
Before you can use Webhooks or the Message Queue Framework (MQF), you must be running Adobe Commerce, as these features are not supported in Magento Open Source.
- Webhook capability: Webhooks require Adobe’s Events Framework to be enabled, or a custom module that provides equivalent functionality to capture and send events when system changes occur.
- Message Queue Framework (MQF): MQF is built into Adobe Commerce but depends on RabbitMQ as its message broker, so RabbitMQ must be installed, configured, and operational on your instance.
2. Choose your integration method
-
Use Webhooks if the external system can receive HTTP POST requests in real time and process them immediately. This is generally simpler to set up and works well for lightweight, event-triggered updates.
-
Use Message Queue Framework if you need guaranteed delivery, delayed/batch processing, or expect high event volume that should be processed asynchronously without impacting Magento performance.
3. Set up the event-driven integration using the selected method
Option 1: Webhook-based Integration
-
Identify relevant events: Define which Magento events you want to trigger external workflows.
Common examples:
-
-
-
sales_order_place_after – order placed
-
customer_register_success – new customer
-
catalog_product_save_after – product updated
-
-
-
Create a custom module to dispatch webhooks that listens to the chosen events and sends webhook payloads to the desired external endpoint. The observer should extract key data (e.g. order ID, total amount) and send it as a JSON payload via HTTP.
-
Handle authentication and retry logic (optional)
- In your custom module, secure webhook communication by adding an HMAC signature or API token in the request headers.
- Log all responses for traceability, and configure retry logic to automatically resend failed requests — for example, through a cron job or a retry queue until delivery succeeds.
Option 2: Message Queue-Based Integration
-
Set up RabbitMQ (if not already)
-
Install and configure RabbitMQ as Magento’s message broker.
-
Connect Magento to RabbitMQ via env.php configuration.
-
-
Define a queue and topic in your module
-
Declare the message topic and bind it to a queue.
-
Implement a publisher class to send event data (e.g. order details) to that topic.
-
4. Create a consumer to process messages
- Develop a consumer class that listens to the defined queue and sends the received data to the target system such as an ERP, CRM, or third-party API.
- Register the consumer in your module’s configuration and run it through Magento’s queue system to process messages automatically as they are published.
5. Test the integration
-
Place test orders or trigger events in Magento to publish messages to the queue.
-
Use the RabbitMQ management UI or CLI to confirm that messages are enqueued correctly.
-
Run the consumer and verify that the target system (ERP, CRM, or external API) receives accurate and complete data.
-
Simulate failure scenarios — such as invalid endpoints or network timeouts — to confirm that error handling and retry mechanisms work as expected.
-
Finally, test under load by queueing multiple events to observe throughput and system stability.
Conclusion
Magento supports a range of integration methods, from built-in connectors to API-based, middleware, and event-driven solutions, each suited to different system types and workflow complexity. Selecting the right method depends on your connected platforms, data requirements, and how you plan to manage ongoing maintenance.
On Tap offers two proven ways to achieve seamless connectivity: Integration Flow, our managed iPaaS platform for fast, reliable Magento-to-system integrations with 24/7 monitoring and expert-managed changes; and our systems integration service, which delivers fully tailored connections between Magento and ERP, WMS, CRM, PIM, POS, and other platforms to create a unified, automated workflow.
Magento’s flexibility makes almost any integration possible with the right expertise. To see how custom projects are approached in practice, take a look at our Magento website development services.
Learn more about our systems integration service or contact us to discuss your integration requirements and identify the best approach for your business.