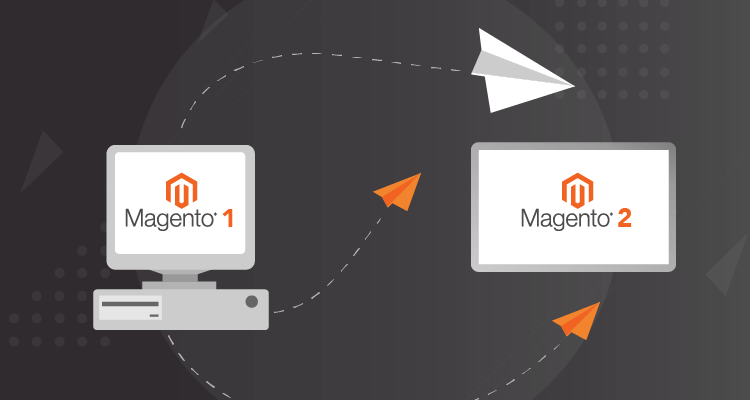
Magento 1 is no longer officially supported, meaning there are no security patches, performance updates, or compatibility fixes. Therefore, migrating to Magento 2 is essential for merchants still using Magento 1. However, this migration is not a simple version upgrade. Magento 2 differs fundamentally from Magento 1 in its architecture, technology stack, and development standards, which affects how data, functionalities, and integrations transfer to the new platform.
This guide covers the full Magento 1 to Magento 2 migration process, from planning your scope, budget, and hosting environment to executing each phase. We also highlight common risks to avoid and when to bring in professional support.
Planning your migration: Define scope, set clear goals and prepare resources
This section helps you understand how Magento 2 differs from Magento 1, define clear business outcomes, and assess the time, resources, and budget required to succeed.
Set your Magento 2 migration scope: What to migrate, rebuild, or retire based on key differences
Begin by setting your migration scope—deciding what to migrate, rebuild, or retire based on these differences and their impact on scope, cost, and complexity.
| Area | Magento 1 | Magento 2 | Migration implication |
| Theme and storefront | Themes use .phtml templates and Prototype.js. Layout is based on static XML blocks and limited responsiveness. | Uses layout XML + Knockout.js for UI rendering, LESS for styling, and RequireJS for JS loading. Responsive by default. |
Magento 1 themes are not compatible with Magento 2. You must rebuild your theme for Magento 2. Consider reusing your design, adopting a new frontend like Hyvä, or using Magento’s Luma/Blank base themes.
|
| Extensions and third-party modules | Modules often use class rewrites and global observers. Conflicts and code overlap are common. | Modules must use dependency injection (DI), plugins, and service contracts. Rewrites are no longer allowed. | Magento 1 modules cannot be reused. Each extension must be replaced with a Magento 2 version (if available), rebuilt for compatibility, or removed if obsolete. |
| Custom features and code modifications | Custom logic is typically implemented by modifying core files, adding observers, or overriding classes. | Magento 2 enforces a strict plugin-based and service-contract-based architecture. Core modification is disallowed. | All custom logic must be audited. Rebuild essential features using Magento 2 methods (plugins, ViewModels, DI). Consider simplifying or retiring low-value customisations. |
| Store data and configuration | Magento 1 stores product, customer, and order data using a structure called EAV (Entity-Attribute-Value), alongside optional flat tables that improve frontend performance by denormalising data. Configuration settings are stored as serialised strings in the database. | Magento 2 still uses EAV for core entities, but its indexing system has been redesigned to eliminate the need for separate flat tables. Configuration data is now stored in JSON format with scoped paths, making it easier to override values per website or store view. | Core data can be migrated with Magento’s Data Migration Tool. Custom attributes, module data, and deprecated records require manual mapping or cleanup before migration. |
| Hosting and infrastructure | Supports older software (PHP 5.6–7.0, MySQL 5.6). Can run on shared or low-spec VPS hosting. | Requires PHP 8.1+, MySQL 8.0, Elasticsearch, and more RAM/CPU. Composer and CLI usage are standard. | Check whether your current server meets Magento 2’s requirements. You may need to upgrade or switch to Magento-optimised cloud hosting. |
| URL structure and SEO config | Magento 1 manages URLs per entity (e.g. product or category) using flat tables. You often see .html suffixes, and SEO elements like canonical tags are typically handled through templates or third-party extensions. | Magento 2 manages URL rewrites through redesigned tables and centralised admin settings. Canonical tags and meta directives are configured directly in the admin or via layout XML, reducing reliance on custom templates or extensions. | Magento 2 may generate different URLs. You must review and recreate any custom rewrites and apply 301 redirects where URL structure changes (e.g. suffix removal or path flattening). Review canonical tag logic to prevent SEO regression. |
| External integrations | Commonly built using cron scripts, database queries, or legacy SOAP APIs. Many custom scripts directly access core tables. | Integrations should use REST or GraphQL APIs, with service contracts and asynchronous processing. Direct DB access is discouraged. | Rebuild or replace all integrations. Replace cron-based sync jobs with API-based logic if possible. Third-party ERP, CRM, or marketing connectors must be compatible with Magento 2. |
Define what your Magento 2 migration needs to achieve
Once you understand what’s changing between Magento 1 and Magento 2, the next step is to clarify what your migration must accomplish from a business perspective.
The following goals help you focus your efforts where they matter most:
-
Preserve critical business data: Product catalogues, customer accounts, orders, and store settings are essential. Since Magento 2 structures data differently, migration requires careful planning, mapping, and validation to ensure accuracy and avoid disruptions.
-
Maintain a seamless customer experience: Minor changes or downtime can confuse customers and cause lost sales. Migration should preserve or enhance the shopping experience to protect revenue and trust.
-
Protect SEO and traffic: Magento 2’s handling of URLs and metadata differs from Magento 1. Without proper redirects, search rankings can drop sharply. Managing SEO continuity is vital to prevent traffic and revenue loss.
-
Preserve operational workflows: Order flows, admin tools, and reporting often don’t transfer directly due to Magento 1 customisations. Identifying and rebuilding these workflows is key to avoiding fulfilment delays and backend errors post-launch.
Prepare your timeline, budget, and delivery resources
No Magento 2 migrations are the same. Achieving your goals requires a realistic plan with the right timeline, resources, and budget.
-
Timeline: Estimate based on rebuild effort, not just store size. Complexity from custom features, integrations, and multi-store setups extends timelines. Include QA, SEO testing, data validation, and training.
-
Timing: Launch during low-traffic periods, allowing enough time for testing and fixes. Avoid going live near major promotions to reduce revenue risks.
-
Resources: Assign internal teams to catalogue setup and standard migration, while outsourcing custom development, theme rebuilds, and integrations to Magento experts. Define roles upfront to stay on track.
-
Budget: Account for more than development costs—include design, licensing, integration redevelopment, data cleanup, SEO, testing, and post-launch support to prevent unexpected expenses.
12 steps to migrate from Magento 1 to Magento 2
The process covers preparing your infrastructure, rebuilding the frontend, migrating data, restoring integrations, launching the new store, and completing final post-launch checks to ensure stability and performance.
Note: The durations below reflect a full migration approach for a mid-sized Magento 1 store with moderate complexity. In a phased migration, these 12 steps may be split into multiple stages while Magento 1 remains live, which can reduce risk but will alter the sequence and extend the overall timeline.
| Step | Task | Estimated Duration |
| 1 | Back up your Magento 1 store | 0.5–1 day |
| 2 | Choose and prepare your Magento 2 hosting environment | 1–2 days |
| 3 | Set up your Magento 2 development instance | 1–2 days |
| 4 | Rebuild or redesign the storefront theme | 5–15 days |
| 5 | Rebuild or replace custom modules, extensions, and business-specific functionality | 5–15 days |
| 6 | Prepare and migrate store data | 3–7 days |
| 7 | Rebuild CMS pages, static blocks, and media content | 2–5 days |
| 8 | Reconnect integrations and third-party services | 3–7 days |
| 9 | Configure URL redirects and SEO continuity | 1–2 days |
| 10 | Perform full-site quality assurance before launch | 3–5 days |
| 11 | Launch your Magento 2 store | 0.5–1 day |
| 12 | Final testing and monitoring | 5–10 days (ongoing observation) |
Step 1: Back up your Magento 1 store
Before starting your Magento 2 migration, you should create a complete backup of your existing Magento 1 store. This backup protects your data in case something goes wrong and gives your team a safe reference for design, content, or settings during the rebuild process.
What to include in your backup:
-
Magento Database – Contains critical store data: products, customers, orders, CMS content, tax rules, settings, and store configuration.
-
Magento files – Includes your theme files, media (product images, banners), custom code, installed extensions, and core Magento files.
-
Server settings – These are files that control how your website behaves on the server, including redirects, access rules, caching, SEO settings, and scheduled tasks. Common examples include .htaccess, robots.txt, and scripts used for cron jobs.
Different ways to back up your Magento 1 store:
| Method | How it works |
| Hosting panel backup | Most hosting providers offer a control panel (like cPanel or Plesk) with tools to back up your website. You can download your full Magento folder (the codebase and media files) and export your database using tools like phpMyAdmin. |
| Manual backup via command line (SSH) |
If your hosting environment allows SSH (secure shell) access, you can log into the server and manually back up both your Magento files and database using terminal commands.
|
| Magento Admin backup |
Magento 1 includes a basic built-in backup tool. From your admin panel, go to System > Tools > Backups. You can choose to back up the database, media, or full system.
|
| Third-party backup extensions | Some Magento 1 extensions (e.g. Aitoc Backup Pro, MageBackup) allow you to create scheduled backups and automatically send them to cloud storage (e.g. Dropbox or Google Drive). |
Step 2: Choose and prepare your Magento 2 hosting environment
To ensure a smooth migration and long-term performance, you should review your current setup, choose appropriate hosting for Magento 2, and prepare your new environment before any data or theme migration begins.
1. Check your current hosting environment and Magento 2 requirements
Start by reviewing whether your existing server is compatible with the version of Magento 2 you plan to install.
Magento 2 utilises newer versions of PHP, MySQL/MariaDB, and leverages technologies such as Elasticsearch, Redis, and Varnish to enhance performance.
For full details on version compatibility and system requirements, refer to the official Magento 2 system requirements guide.
If you're still on shared hosting or running older software versions, it's likely time to upgrade or switch to a new provider.
2. Choose hosting solutions and providers
If your current hosting does not meet Magento 2 requirements, you have two options:
-
Upgrade your existing server (e.g. update PHP, increase memory, enable Redis or Elasticsearch), or
-
Move to a Magento 2-optimised hosting provider that offers better performance, security, and scalability.
Common Magento 2 hosting types:
-
VPS (Virtual Private Server): A virtual slice of a physical server with dedicated resources (RAM, CPU, storage) allocated to your store, allowing you to have more control than shared hosting, but still share physical hardware.
-
Dedicated Server: A physical server used entirely by your store, ideal for large or high-traffic stores, but less flexible, scaling often requires manual upgrades or migrations.
-
Managed Magento Hosting: A hosting service specifically built for Magento 2. The provider sets up and manages the server, optimises it for Magento performance, and handles maintenance tasks like backups, security, and updates.
-
Cloud Hosting (e.g. AWS, GCP, Azure): A virtual server hosted in the cloud, where you can scale resources up or down as needed, ideal for complex builds or businesses planning for long-term growth and custom infrastructure.
For merchants seeking a trusted hosting provider, On Tap offers a specialised Magento hosting solution designed for performance and scalability, with autoscaling, proactive monitoring, and a hybrid cloud infrastructure suited to business needs.
3. Configure your server for Magento 2 caching and performance
Once you've selected your hosting, you must configure the server to support Magento 2’s default caching stack. Magento 2 relies heavily on advanced caching to deliver frontend performance and backend responsiveness.
Ensure the following components are properly installed and configured:
-
Varnish (Full Page Cache): Magento 2 uses Varnish as its recommended full-page cache solution. It must be installed as a separate layer, with Magento’s FPC mode set to Varnish in Stores > Configuration > Advanced > System > Full Page Cache. You’ll also need to apply Magento’s auto-generated VCL file to your Varnish configuration.
-
Redis (Backend and Session Cache): Redis is used to store Magento’s configuration cache and session data. Ensure it’s installed and that your env.php file includes the correct Redis connection settings under cache and session.
-
OPcache: A PHP extension that pre-compiles and stores scripts in memory to avoid repeated parsing. OPcache significantly improves Magento’s performance and should be enabled by default in production environments.
-
File system permissions: Incorrect permissions can prevent Magento from writing to cache directories (e.g. var/cache, generated/, pub/static). Ensure permissions and ownership are properly set based on your server user.
-
Cron jobs: Magento uses scheduled cron tasks to generate product feeds, reindex data, clean logs, and refresh cache. Set up cron correctly using the bin/magento cron:install command, and verify it's running reliably.
-
CDN and static asset caching: If using a CDN, configure it to cache static content (JS, CSS, images) for faster global delivery. Magento 2 supports static content versioning to ensure cache busting on deployment.
By configuring these elements early, you ensure that Magento 2 can run smoothly during theme development, testing, and especially after go-live.
Step 3: Set up your Magento 2 development instance
Once your hosting environment is ready, the next step is to install Magento 2 in a clean, isolated instance for development and testing.
1. Choose the appropriate Magento 2 version
Select a stable Magento 2 version that fits your project’s technical and business needs. In most cases, you should install the latest supported release to benefit from improved performance, security updates, and extension compatibility.
For a detailed overview of all Magento 2 versions, release dates, and their key changes, read our full guide: Magento versions timeline: Milestones, key updates and future insights
2. Install Magento 2 in a separate environment
Your development instance should be completely separate from your Magento 1 installation, either on a subdomain (e.g. dev.yourdomain.com), a separate server, or a local development environment or container (e.g. Docker).
Key setup tasks include:
-
Creating a clean Magento 2 root directory
-
Connecting to a new, empty database
-
Running the Magento 2 installation (via web installer or CLI)
-
Enabling developer mode for easier debugging and template updates
-
Disabling full-page cache and Varnish during initial theme and module development
Note: Do not install Magento 2 in the same directory as Magento 1, and do not reuse the same database or admin credentials.
3. Apply basic isolation and security
To prevent search engines, customers, or bots from accidentally discovering your in-progress build:
-
Block indexing with robots.txt or meta tags
-
Protect the environment with a password or IP restriction
-
Use a staging-specific URL and do not link from your live site
4. Install your development tools
If your team is using version control or automation, set it up at this stage:
-
Git or other version control systems
-
Build tools, deployment scripts, or Docker configurations
-
API keys or sandbox credentials for third-party integrations
-
Access to staging services (e.g. ERP test accounts, payment gateways)
Step 4: Design and develop your Magento 2 storefront
1. Evaluate and enhance or redesign your storefront
Magento 1 themes are not compatible with Magento 2 due to major architectural changes in layout, templating, and frontend logic. Whether you're keeping the same look or aiming for a fresh design, your storefront must be rebuilt using Magento 2’s theme framework. This presents a valuable opportunity to improve speed, UX, and visual design.
2. Choose a frontend approach
Magento 2 offers several options for building the storefront. Each option affects development time, site performance, and future flexibility. Your choice should based on your store’s needs, your team’s skillset, and your long-term vision.
| Option | Description |
| Luma (default theme) | Magento’s legacy frontend stack (Knockout.js, LESS). Still supported but dated in architecture and performance, and rarely recommended for new builds. |
| Blank theme | A minimalist version of Luma used as a starting point for custom Magento 2 themes. It offers a cleaner codebase than Luma but still uses Magento’s legacy frontend stack, including Knockout.js and RequireJS. |
| Hyvä theme | A modern Magento 2 frontend built with Alpine.js and Tailwind CSS. Removes Magento’s default JavaScript stack for exceptional speed and developer simplicity. Ideal for stores prioritising performance and frontend maintainability. |
| Carbon Accelerator | A prebuilt, production-ready Hyvä-based framework developed by On Tap. Designed for fast B2C and B2B deployments with proven UX patterns and built-in best practices. Speeds up time-to-launch from months to weeks. |
Experience faster launches with Carbon — On Tap’s prebuilt, production-ready Hyvä-based framework. Designed for rapid B2C and B2B deployments, it delivers proven UX patterns and built-in best practices to cut your time-to-market from months to weeks.
Step 5: Rebuild or replace custom modules, extensions, and business-specific functionality
This step involves auditing all non-core functionality, including third-party extensions, bespoke modules, and business-specific logic, to determine what can be replaced with Magento 2 equivalents and what must be rebuilt.
1. Audit all non-core functionality and decide what to carry over or retire
Start by thoroughly reviewing everything in your Magento 1 store that goes beyond the core installation. This helps you avoid blindly migrating unused or outdated features, and ensures that only high-value functionality is rebuilt or replaced in Magento 2.
Here’s what to audit:
-
Third-party extensions
-
Custom-built modules
-
Checkout customisations
-
Admin-side tools
-
Standalone scripts (cron jobs, API endpoints, data feeds)
-
Frontend widgets or JavaScript components
2. Classify each item you plan to carry over and define its migration path
Note: This step focuses on features you’ve decided to carry over into Magento 2 — either by rebuilding them with Magento 2 architecture, replacing them with updated extensions, or configuring native capabilities.
| Type | Recommended action |
| Third-party extensions with equivalent Magento 2 versions | Replace with the official Magento 2 version. Install, configure, and test. |
| Third-party extensions with no Magento 2 version | Find an alternative extension or rebuild the functionality manually. |
| Custom-built modules | Rebuild using Magento 2 architecture, including plugins, dependency injection, and service contracts. |
| Standalone scripts (cron jobs, API endpoints, data feeds) | Rebuild as Magento 2 modules, CLI commands, or API controllers following Magento best practices. |
3. Rebuild using Magento 2 architecture
Magento 2 uses a more structured and modular system. All custom logic must be rewritten to fit Magento 2 standards.
| Magento 1 pattern | Magento 2 approach |
| Mage::getModel() or helpers | Use dependency injection and service classes. For models, use factories (ModelFactory) where needed. |
| Class rewrites | Use plugins or observers to change behaviour |
| Custom admin UI with blocks | Use UI components and layout XML |
| Cron jobs in /shell/ or /scripts/ | Define scheduled jobs using crontab.xml in a module |
| Custom PHP APIs | Create REST or GraphQL endpoints using Magento’s routing system |
Tips:
-
Use version control to track changes
-
Keep logic modular and testable
-
Reuse services and components where possible
Note: Migrating extension-related data
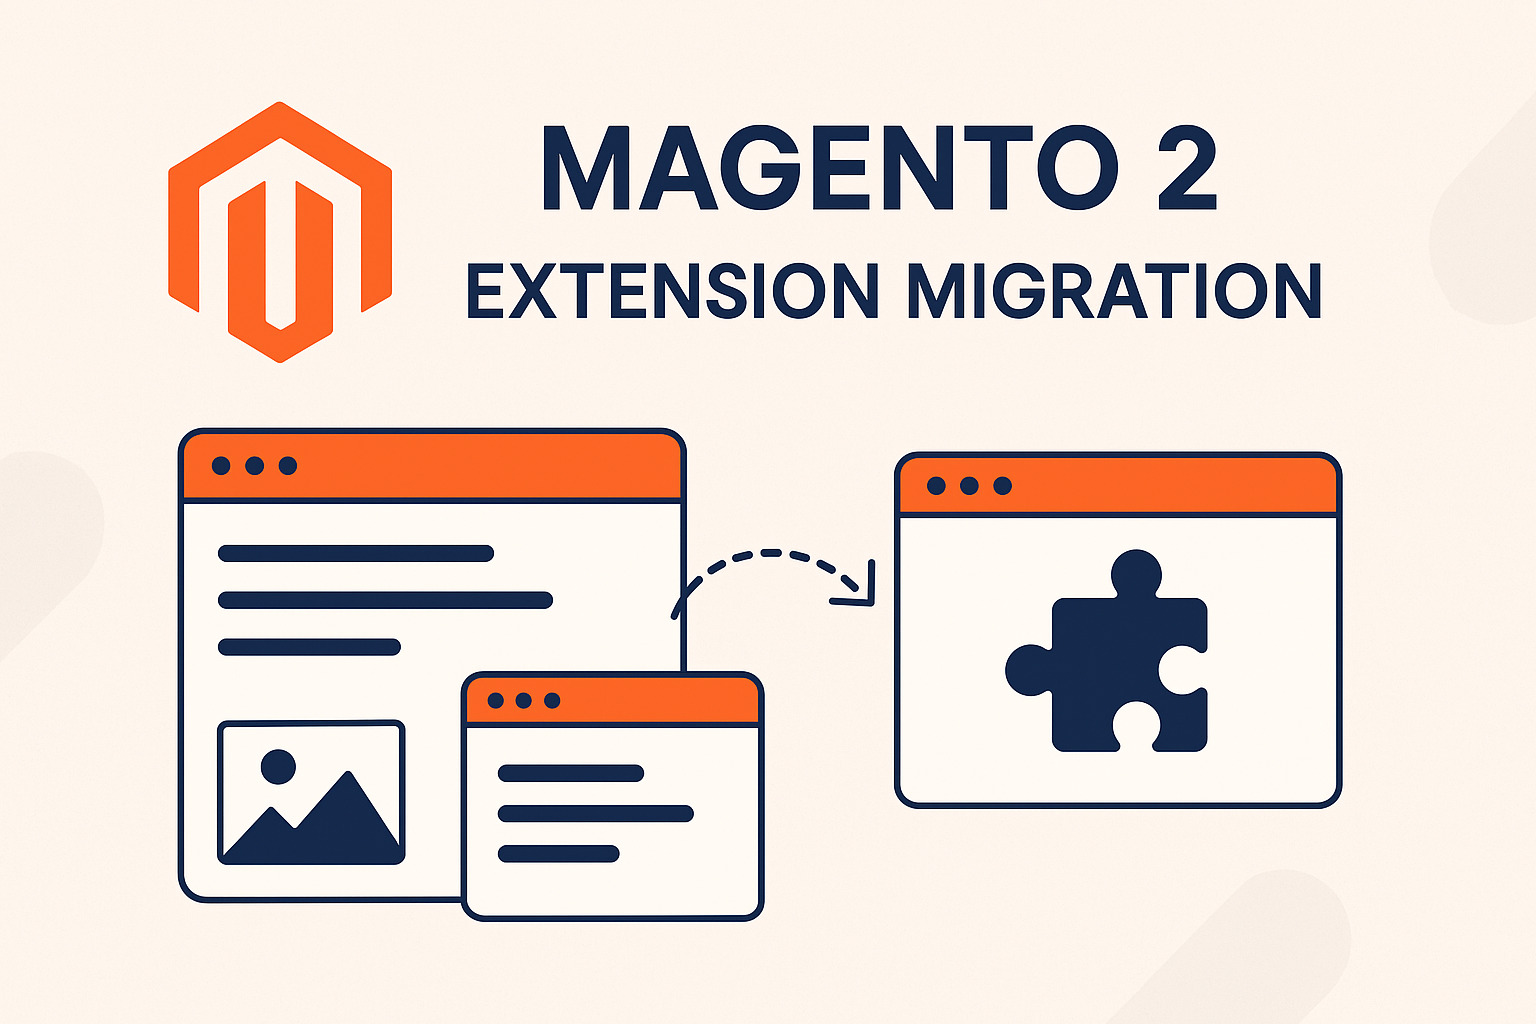
Some extensions store critical data (e.g. blog content, reviews, reward points, FAQs). This data is not handled by Magento’s core Data Migration Tool and must be migrated separately.
For a more detailed guide on how to migrate extensions from Magento 1 to Magento 2, read Magento 2 Extension Migration: A Complete Step-by-Step Guide
Step 6: Prepare and migrate store data
While Adobe provides an official Data Migration Tool (DMT) for core data, many stores also have custom entities and extension-related records that must be handled separately.
1. Audit and clean up your Magento 1 data
Before any data is migrated, perform a full audit of your Magento 1 database:
-
Remove obsolete products, disabled categories, and outdated customer accounts
-
Clean orphaned data, such as SKUs with no parent product or CMS blocks with no layout reference
-
Review and merge duplicate customer records
-
Delete unused attributes, shipping rules, or tax configurations
-
Check for inconsistencies in order, invoice, or credit memo data
2. Define your data types and scope
Once your data is clean, define what types of data you need to migrate:
-
Core entities: Products, categories, customers, orders, store settings
-
CMS content: Pages, blocks, widgets, URL rewrites
-
Custom/extension data: Reward points, blog posts, FAQs, store locators, logs, token history
-
Media and files: Product images, downloads, banners, PDF attachments
This categorisation ensures you choose the right tool or method for each type of data, especially for custom tables or modules not covered by the DMT.
3. Choose and execute the appropriate migration method
Depending on your store size, data complexity, and customisation level, use one or more of the following migration methods:
| Method | Description |
| Magento Data Migration Tool (official) |
Data types supported: Core Magento entities, including products, customers, orders, categories, store configurations, and CMS pages. Best for: Technical teams migrating full stores with standard Magento structure and needing to sync changes made after initial migration. |
| Automated migration services (e.g. LitExtension, Cart2Cart) |
Data types supported: Products, categories, customers, orders, coupons, CMS pages, blog posts (varies by service). Best for: Small to medium stores with limited customisation, needing a fast and user-friendly migration without coding. |
| Migration via SQL or scripts |
Data types supported: Custom database tables, extension data, logs, form entries, and partially structured data. Best for: Developers migrating complex or custom data not handled by DMT or automated tools. |
| CSV import/export |
Data types supported: Simple, flat data like products, customer records, newsletter subscribers, CMS content. Best for: Small datasets or partial migrations with limited data relationships |
Step 7: Rebuild CMS pages, static blocks, and media content
After core data has been migrated and your theme is in place, you’ll need to manually rebuild CMS content to match your Magento 2 storefront structure.
1. Review and clean up migrated CMS content
If you’ve used the Data Migration Tool to transfer CMS data:
-
Check all key pages (e.g. homepage, about, contact) and static blocks for layout issues
-
Fix broken HTML, inline styles, or leftover scripts that don’t work in Magento 2
-
Remove outdated messaging, design elements, or links that no longer reflect your brand
2. Rebuild core pages and promotional content
Use Magento 2’s built-in CMS tools (or Page Builder if enabled) to recreate important sections:
-
Homepage banners and hero sections
-
Promotional blocks (e.g. shipping offers, product guarantees)
-
Static blocks used in category pages, footers, or sidebars
-
Landing pages for marketing campaigns, brand stories, or buying guides
Make sure content is optimised for mobile, responsive across breakpoints, and styled to match your new theme.
3. Optimise and update embedded content
-
Replace outdated images, icons, or branding visuals
-
Ensure all links (internal and external) are working correctly
-
Review embedded videos, scripts, or tracking codes for compatibility with Magento 2
Step 8: Reconnect integrations and third-party services
Magento 2 handles system connections differently from Magento 1, so each integration must be reviewed, reconfigured, or rebuilt to ensure compatibility and stability.
1. List all integrations from your Magento 1 store
Create a full list of third-party and custom connections, including:
-
Payment gateways and fraud protection tools
-
Shipping carriers and rate providers
-
Tax calculation services
-
Marketing, email, and SMS platforms
-
ERP, PIM, CRM, or inventory systems
-
Middleware or data feeds (inbound and outbound)
As you list them, make a note of which ones were set up using Magento’s admin panel or prebuilt extensions, and which ones were built using custom scripts or developer code. This helps you separate reconfiguration tasks from custom redevelopment work.
2. Reinstall and configure third-party services in Magento 2
For each service you used via native Magento 1 integration or extension:
-
Check if the provider offers a Magento 2 version or an integration module
-
Install the Magento 2 version via Composer or ZIP
-
Re-enter API credentials, webhook URLs, or tokens
-
Review and configure service settings inside the Magento 2 admin
-
Enable and test any frontend components (e.g. payment methods, shipping selectors)
If the provider no longer supports Magento 2, choose an alternative or plan to build a custom connection.
3. Rebuild custom integrations using Magento 2 architecture
Magento 1 integrations using cron scripts or direct database access must be rebuilt securely for Magento 2.
-
Define integration scope: Identify data flow type (inbound, outbound, bidirectional) and content (e.g., orders, stock).
-
Create a Magento 2 module: Encapsulate all logic in a proper module—not in root or shell folders.
-
Use service contracts: Replace direct database queries with Magento 2 service contracts.
-
Communicate via APIs: Use REST or GraphQL for external connections; create custom endpoints if needed.
-
Schedule with Magento cron: Define recurring jobs using crontab.xml for scheduled tasks.
-
Validate data: Ensure field mapping, formats, and business rules match target systems.
-
Add logging and error handling: Log successes, failures, timeouts; send alerts for critical errors.
Step 9: Configure URL redirects and SEO continuity
To preserve your organic search performance, you need to actively manage SEO during your Magento 1 to Magento 2 migration. Magento 2 handles URL generation, metadata, canonical tags, and structured data differently from Magento 1, so you must recheck and reconfigure these areas before launch. This step ensures that search engines maintain your rankings and that users land on the correct pages after migration.
1. Crawl and document all existing URLs and metadata from Magento 1
Use a site crawler like Screaming Frog, Sitebulb, or Ahrefs to export a full list of active URLs from your Magento 1 store. Include:
-
Product, category, CMS, and landing page URLs
-
Metadata such as page titles and descriptions
-
Canonical tags
-
H1 headings
This gives you a reference point for mapping redirects and identifying gaps.
2. Create and apply 301 redirect rules for changed URLs
Magento 2 can generate different URLs from Magento 1 due to changes in rewrite logic or suffix settings. To manage this, compare URLs from both versions and create 301 redirects for any changes.
-
Crawl your Magento 2 staging site and compare URLs with Magento 1
-
Find missing, altered, or broken URLs
-
Create 301 redirects for all changed URLs
Redirects can be set via Magento admin (Marketing > URL Rewrites), bulk imports (CLI or third-party tools), or web server config (Apache .htaccess or Nginx). Avoid redirect chains; each old URL should point directly to its new URL.
3. Reconfigure canonical tags and indexation settings
Magento 2 has different defaults for canonical URLs and robots directives. You must:
-
Enable canonical tags for products and categories in Stores > Configuration > Catalogue> Search Engine Optimisation
-
Ensure each page has only one self-referencing canonical tag
-
Add noindex to sensitive areas like checkout, customer account, and search results pages
-
Confirm that your staging or dev environments are blocked from indexing using robots.txt or password protection
4. Review and optimise metadata
Before launch, check that your metadata is properly applied in Magento 2:
-
Ensure all key products, categories, and CMS pages have custom page titles and meta descriptions
-
Avoid leaving default values like “Magento Commerce” or blank fields
-
Prioritise top landing pages and update their metadata for improved click-through rates
5. Validate structured data (schema markup)
Magento 2 includes a basic JSON-LD schema for product pages, but it may differ from what you had in Magento 1. Use Google’s Rich Results Test to verify that:
-
Product pages contain valid schema for Product, Offer, and Review
-
Breadcrumbs use the correct structured data format
-
CMS and blog content (if applicable) includes appropriate schema such as Article or FAQ
Add or extend markup using theme code or a structured data extension if necessary.
Important: Magento 2 does not provide structured data for CMS pages, blog posts, or custom content types by default.
6. Regenerate your XML sitemap and update robots.txt
In Magento 2:
-
Enable and configure the XML sitemap under Marketing > SEO & Search > Site Map
-
Regenerate it and submit the new sitemap to Google Search Console and Bing Webmaster Tools
-
Review and update robots.txt to:
-
Allow crawling of public-facing pages
-
Block private or duplicate URLs like /checkout/, /customer/, and layered navigation with filter params
Make sure old disallow rules from Magento 1 don’t carry over if they are no longer valid.
Step 10: Perform full-site quality assurance before launch
Before switching your live domain to Magento 2, your entire site must be thoroughly reviewed to ensure everything works as expected.
1. Verify storefront functionality across devices and browsers
Manually test your Magento 2 frontend on desktop, tablet, and mobile using multiple browsers (Chrome, Firefox, Safari, Edge). Check:
-
Homepage layout and banners
-
Menus and category browsing
-
Layered navigation filters and pagination
-
Site search results and redirect behaviour
-
Product pages, variant selections, image galleries, and add to cart
-
CMS pages and content blocks (e.g. About, Contact, FAQs)
-
Wishlist, compare, and product review functions (if used)
-
End-to-end checkout and payment flows
2. Confirm migrated data and configuration accuracy
Review key data and system settings to ensure they were transferred correctly:
-
Product attributes, categories, inventory, pricing, visibility
-
Customer accounts, saved addresses, order history
-
Tax classes, shipping zones, currencies, and store locale settings
-
CMS pages and blocks are assigned to the correct store views
-
Media files load properly on product and content pages
3. Test admin workflows and permissions
-
Create and edit orders in the admin
-
Apply refunds, credit memos, and status changes
-
Assign admin roles and verify access controls
-
Export reports and confirm filters return correct results
-
Test scheduled tasks (e.g. newsletter queue, reward point expiry, cleanup jobs)
-
Reindex and clear cache using both admin and CLI
4. Validate integrations and data syncs
Confirm all connected systems (e.g., ERP, CRM) are functional and exchanging data correctly. Perform technical testing to verify it works as expected:
-
Trigger real or sandbox transactions (e.g. send test orders, sync sample stock)
-
Monitor API requests, logs, and queue behaviour
-
Validate that external systems correctly receive or return data
-
Confirm bidirectional syncs (if used) update data in Magento properly
-
Test how the system handles failures or timeouts.
All integrations should have working logs, correct credentials, and no errors in Magento logs or external systems.
5. Review design consistency and user experience
-
Ensure spacing, fonts, icons, and brand assets are consistent with your guidelines
-
Check for leftover Magento placeholder content (e.g. “Lorem Ipsum” or demo blocks)
-
Confirm mobile responsiveness across breakpoints
-
Validate button click areas, font sizes, and image load speeds
-
Use screen reader tools or accessibility scanners if compliance is required
6. Run performance and error checks
-
Use browser dev tools to check for JavaScript or CSS errors
-
Confirm HTML and layout are valid and semantic
-
Run page speed tests (e.g. Google PageSpeed Insights or WebPageTest)
-
Monitor logs for PHP errors, exceptions, and failed cron tasks
-
Run bin/magento setup:di:compile, setup:upgrade, indexer:reindex, and cache: flush to confirm build health
7. Complete user acceptance testing (UAT)
Have internal stakeholders, including customer service, marketing, and operations, review the site from their perspective:
-
Can they place and refund test orders?
-
Can they use the admin interface effectively?
-
Do the tools and flows reflect how they work today?
Collect feedback and resolve blockers before going live.
Step 11: Go live with your Magento 2 store
Once your Magento 2 site has passed full QA and all integrations are verified, you’re ready to make it live.
1. Schedule launch during a low-traffic window
Plan your go-live during off-peak hours, such as late at night or early morning in your primary market. Notify your internal team, hosting provider, and agency partners in advance so support is available.
2. Apply a short content and admin freeze
In the final 24 to 48 hours before launch:
-
Avoid changes to your Magento 1 store that affect products, customers, or orders
-
Inform staff not to modify tax settings, inventory, or CMS content
-
Lock admin access if needed to ensure no data discrepancies occur during final sync
This ensures a stable snapshot for go-live and prevents post-migration confusion.
3. Perform final delta data migration
If any product data, orders, or customer records changed after your initial migration, use a final “delta migration” pass to bring Magento 2 up to date.
Typical delta syncs include:
-
Orders placed since the last migration run
-
New customer signups
-
Inventory or price updates
-
New products or CMS changes
Use the Magento 2 Data Migration Tool (delta mode) or custom sync scripts where applicable. Double-check totals after the sync completes.
4. Place Magento 1 in read-only mode as a fallback
To maintain reference access while reducing risks:
-
Keep your Magento 1 store on a separate subdomain (e.g. old.yoursite.com)
-
Prevent indexing by adding noindex to the robots.txt
-
Set admin permissions to read-only or restrict access to specific users
-
Retain it for historical comparison, order validation, or fallback data recovery
Do not leave Magento 1 publicly accessible under its original domain or store views.
5. Update your domain and switch DNS
Once the store is ready and fully synced:
-
Update your domain’s DNS to point to the Magento 2 server
-
Ensure your Magento 2 base_url and base_secure_url settings match your production domain
-
Confirm SSL certificates are valid and auto-renewing
-
Clear caches and reindex immediately after the switch
DNS propagation can take several hours, but most users will reach the new site within minutes.
6. Run final live environment checks
After DNS has propagated and the Magento 2 store is live:
-
Place a test order using a real payment method
-
Review key admin workflows (orders, invoices, credit memos, product edits)
-
Monitor logs (var/log, exception.log, system.log) for errors or warnings
-
Verify cron jobs are running and queues are processing
-
Ensure Google Analytics, GTM, and other tracking tags are firing
7. Communicate the launch internally and externally
Let your team know the store is live, and confirm key functions are operational. Notify customer support, warehouse, marketing, and any partner systems.
Step 12: Final testing and monitoring
After your Magento 2 site goes live, validate performance under real traffic, ensure customer and admin workflows work correctly, and monitor for critical errors. Promptly address issues to complete the migration and keep the store stable.
1. Monitor performance and logs continuously
Check how your live environment handles real user traffic:
-
Review server load, memory usage, and PHP process limits via your hosting dashboard or monitoring tools
-
Use browser dev tools and services like Google PageSpeed Insights to track frontend performance
-
Watch Magento logs (system.log, exception.log, debug.log) for recurring errors
-
Monitor queue consumers and cron jobs to confirm they are running on schedule and not stuck
Set up automated alerts for critical failures such as payment errors, API timeouts, or server crashes.
2. Test critical customer and admin flows in production
Perform real-world tests now that the site is live:
-
Place real orders using different payment methods and delivery options
-
Create a customer account, update personal details, and test password reset
-
Trigger transactional emails and verify deliverability and formatting
-
Issue an invoice and refund from the admin
-
Review product updates, price edits, and inventory changes in the admin
-
Verify tax and shipping calculations in different regions
This confirms your Magento 2 store is functioning correctly under live traffic.
3. Monitor SEO performance and indexing
Search engines will now begin crawling your Magento 2 URLs. Monitor:
-
Google Search Console for crawl coverage, indexation status, and sitemap updates
-
404 reports caused by missed redirects
-
Accuracy of canonical tags
-
Ongoing ranking and traffic trends using Google Analytics and keyword tracking tools
Revisit redirect rules and metadata if visibility issues emerge.
4. Collect user feedback and monitor support channels
Encourage customer service teams to report:
-
Checkout or login issues
-
Mobile or browser-specific bugs
-
UX problems such as confusing layouts or broken buttons
Consider enabling customer feedback tools such as Hotjar, post-purchase surveys, or on-site forms to proactively capture pain points.
5. Triage and resolve remaining issues
Unexpected bugs may appear under live conditions. Create a prioritised task list:
-
High priority: checkout failures, critical errors
-
Medium priority: layout or display issues
-
Low priority: cosmetic fixes, admin UI tweaks
Assign fixes to developers, test thoroughly in staging, and deploy updates through a managed release process.
Once your store has stabilised and early issues are resolved, you can move from migration to regular operations and ongoing optimisation.
Common issues during Magento 1 to Magento 2 migration
Below are the most common issues teams encounter during real-world Magento 1 to Magento 2 migrations, along with their causes, business impact, and how to resolve them effectively.
| Problem | Cause | Business Impact | How to resolve |
| 404 errors and SEO traffic drop after launch | Old Magento 1 URLs don’t match Magento 2 structure; 301 redirects are not mapped or imported | Loss of organic rankings, traffic, and sales within 24–48 hours of launch |
Crawl M1 URLs, map to M2 equivalents, import 301 redirects into Magento or server config, and test via Screaming Frog or GSC |
| Custom features broken or missing | M1 custom modules rebuilt without adapting to Magento 2 architecture (plugins, DI, observers) | Key workflows (e.g. pricing logic, tagging, checkout rules) fail, affecting usability and order processing | Audit custom logic early, rebuild with Magento 2 design patterns, and test using real-world scenarios before launch |
| Missing or broken third-party extension functionality | Magento 1 extensions are not available for Magento 2 or are misconfigured | Lost features (e.g. blog, reward points, product labels), leading to degraded user experience or admin errors | Identify and evaluate extension compatibility in planning, replace or redevelop missing ones, and retest in staging |
| Customer logins fail, or the order history is incomplete | Data Migration Tool or third-party service missed custom fields or tables, or didn’t support complex attributes | Customers can’t log in or view past orders, leading to support load and reduced trust | Verify customer account integrity after data migration, handle custom fields via manual scripts, and test recovery flows |
| Checkout errors or failed orders at go-live | Misconfigured payment/shipping, broken checkout layout, or untested customisations | Immediate loss of revenue, high cart abandonment, and emergency support calls |
Test all checkout scenarios in staging with real payment credentials, simulate guest and registered flows, and confirm order processing |
| Site blocked from indexing or staging links exposed | Staging robots.txt, base URLs, or canonical tags left in production | Search engines can't crawl the site or index it correctly, resulting in traffic drop | Update secure and insecure base URLs, verify robots.txt and canonical tags, and resubmit sitemap in GSC at go-live |
| ERP or inventory sync fails post-launch | Custom sync scripts from M1 are not adapted to Magento 2, or the credentials are not updated | Inventory inaccuracies, order push failures, and operational delays across the warehouse and finance | Rebuild integrations using Magento 2 APIs and cron jobs, test logs, and confirm sync logic under load before DNS switch |
Conclusion
Migrating from Magento 1 to 2 is complex but essential, requiring theme rebuilds, custom module updates, integration rework, and data validation with Magento 2’s architecture. This guide covers all 12 key steps—from backups and setup to data transfer, SEO, and post-launch testing.
For stores with advanced customisations or integrations, consulting a Magento-certified partner is recommended to prevent downtime and errors. On Tap is your trusted Magento website development agency with over 19 years of eCommerce experience. We have achieved a 100% migration success rate with zero data loss. We provide structured, business-led migrations that preserve SEO, support complex integrations, and ensure long-term performance and scalability. Get in touch with our team to discuss your migration plan.